

Bonus - Dynamic Rate Limiting
You are brave and cunning to have come this far. In this bonus getting started guide - we'll show you how to add dynamic rate limiting to your API.
To follow this tutorial you'll need to have completed Step 1 for a Zuplo project, Step 2 to add rate limiting to that route, and Step 3 to add API key authentication to that same route.
What's Dynamic Rate Limiting?
Traditionally, rate limits are static and the same for everyone. This approach doesn't let you tailor your rate limiting to your API user - you might want to offer higher rate limits for customers that pay more. Dynamic rate limiting allows you to determine an appropriate rate limit at request time.
1/ Add Consumer Metadata
Let's make our rate-limiting policy more dynamic, based on properties of the customer. Create a new consumer (Services -> API Key Service -> Configure -> Create Consumer), and in the Metadata field, set the following:
{
  "customerType": "free"
}jsonUpdate the metadata of your other API Key consumer (3-dot menu -> Edit) from Step 3 to
{
  "customerType": "premium"
}
json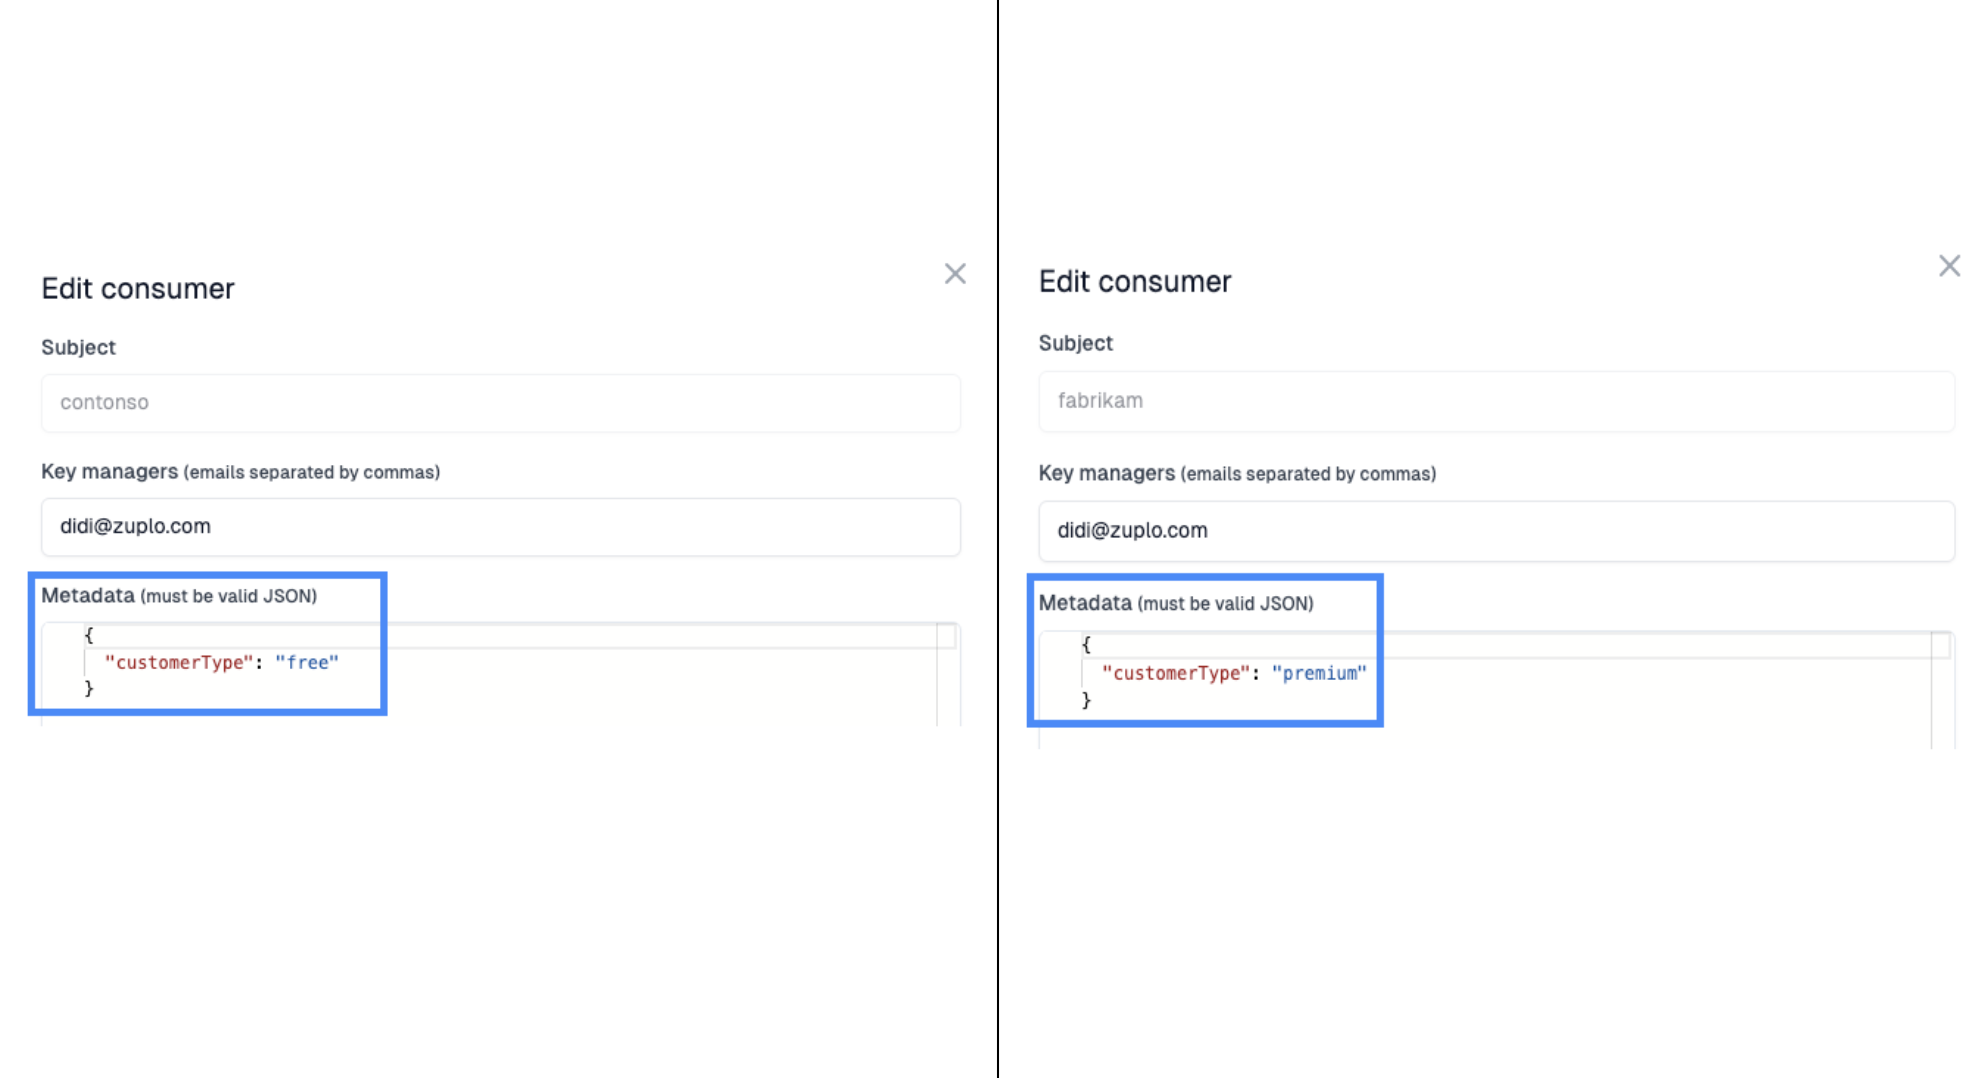
Now that we've users with different customerType, we can utilize this
information to rate limit them differently.
2/ Add a Custom Code Module
Navigate back to the Code tab. Now add a new module to the files section by
clicking the + next to the modules folder and choose new empty module.
Name the module rate-limit.ts.
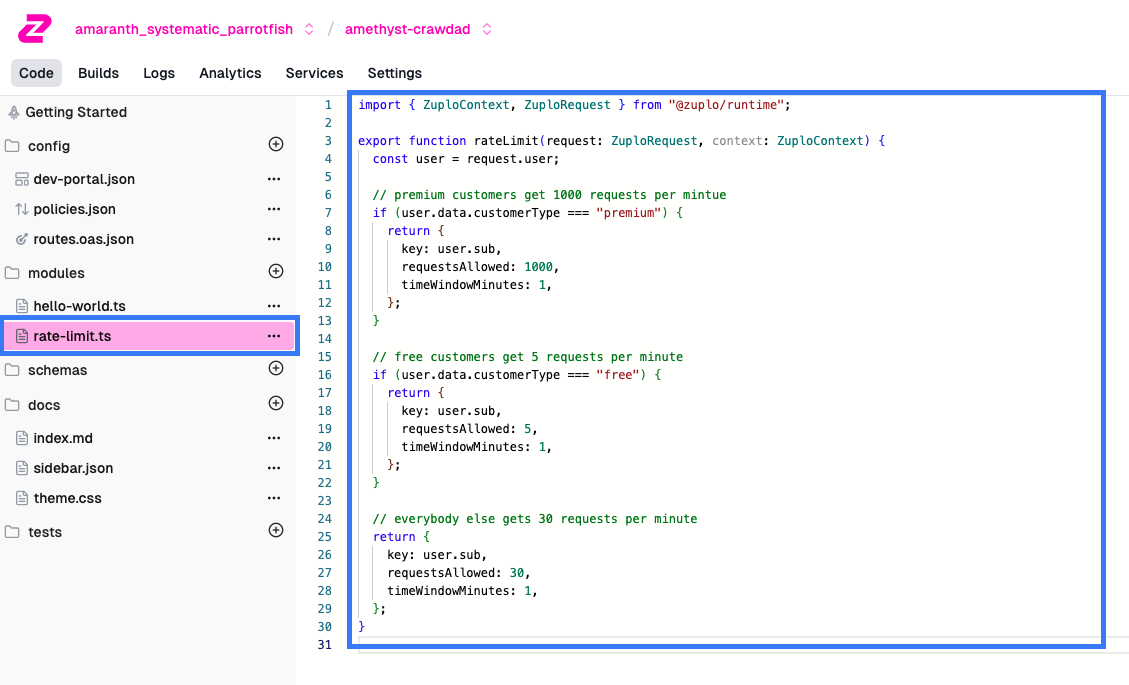
What's a Module?
Modules are Typescript functions that you can execute within Zuplo. They're typically used to add custom code within the request/response pipeline (ex. custom policies or request handlers). You can even perform network requests and use libraries within these modules.
Add the following code to your module.
import { ZuploContext, ZuploRequest } from "@zuplo/runtime";

export function rateLimit(request: ZuploRequest, context: ZuploContext) {
  const user = request.user;

  // premium customers get 1000 requests per mintue
  if (user.data.customerType === "premium") {
    return {
      key: user.sub,
      requestsAllowed: 1000,
      timeWindowMinutes: 1,
    };
  }

  // free customers get 5 requests per minute
  if (user.data.customerType === "free") {
    return {
      key: user.sub,
      requestsAllowed: 5,
      timeWindowMinutes: 1,
    };
  }

  // everybody else gets 30 requests per minute
  return {
    key: user.sub,
    requestsAllowed: 30,
    timeWindowMinutes: 1,
  };
}ts3/ Update your Policy
Now we'll reconfigure the rate-limiting policy to wire up our custom function. Find the policy in the Route Designer and click Edit.
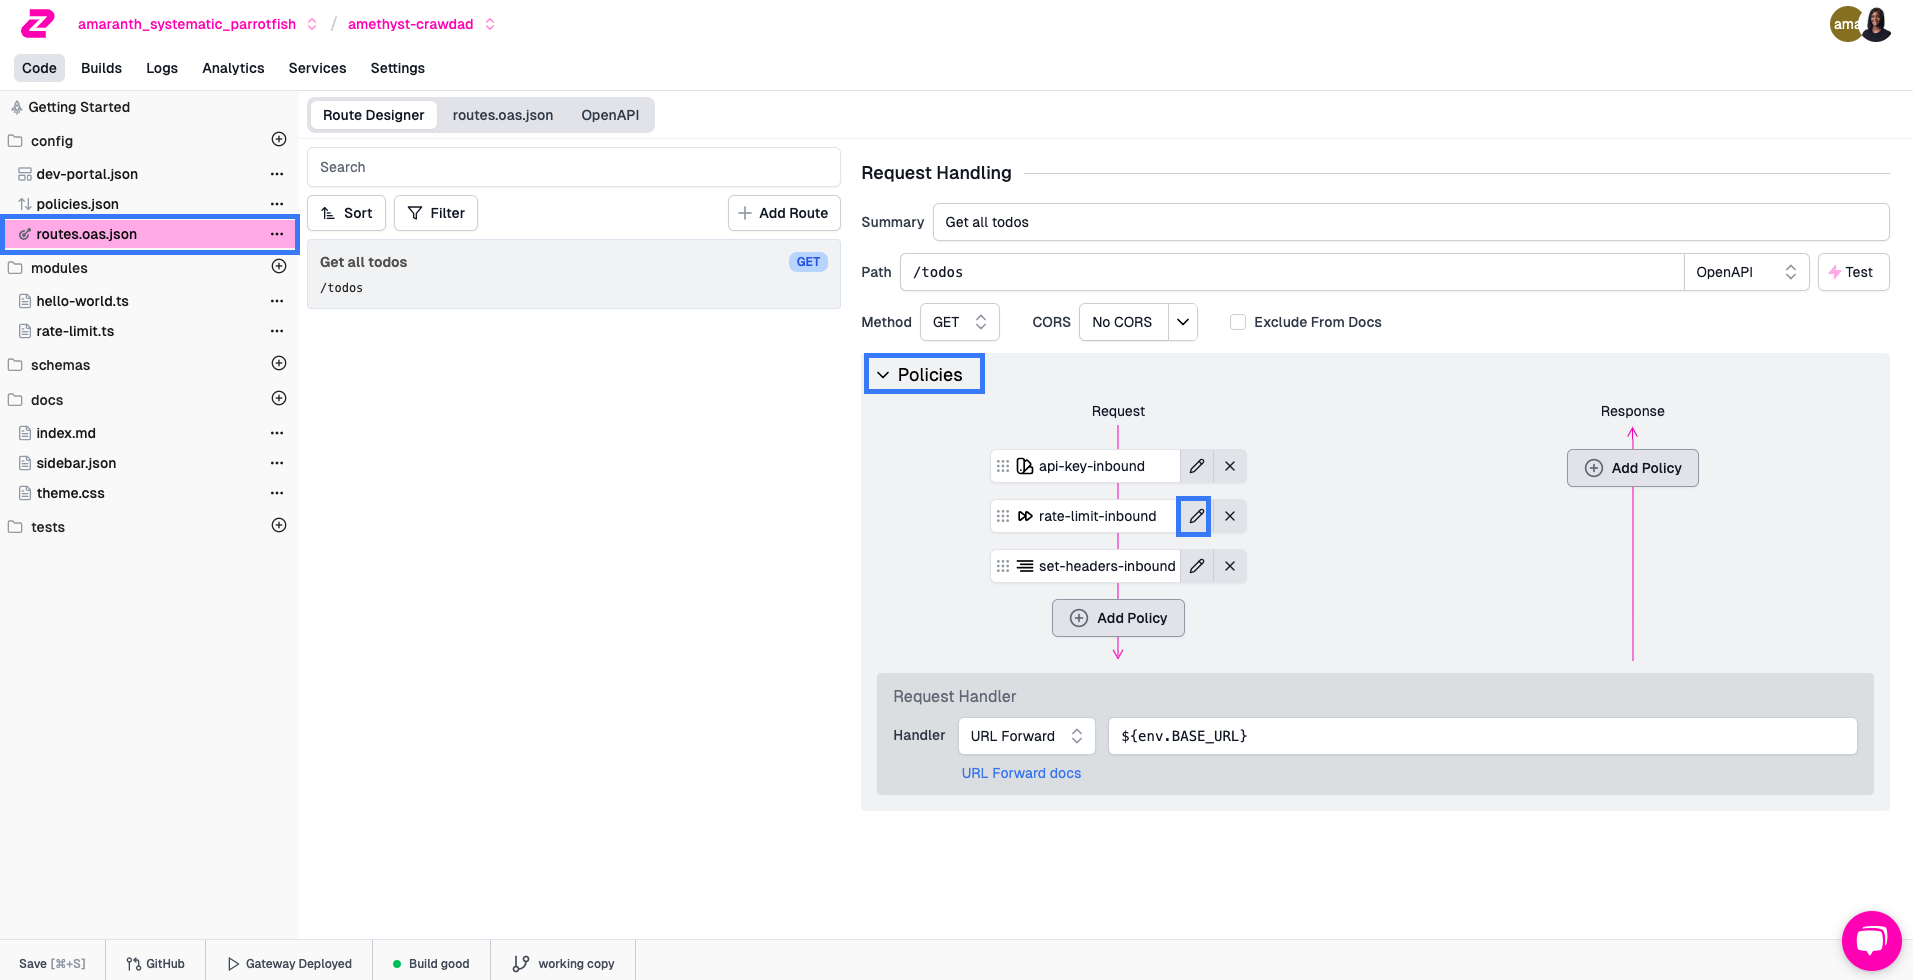
Update the configuration to
{
  "export": "RateLimitInboundPolicy",
  "module": "$import(@zuplo/runtime)",
  "options": {
    "rateLimitBy": "function",
    "requestsAllowed": 2,
    "timeWindowMinutes": 1,
    "identifier": {
      "export": "rateLimit",
      "module": "$import(./modules/rate-limit)"
    }
  }
}jsonBy changing the rateLimitBy to function you are indicating the rate limit
will be determined by a module at runtime. The identifier property is used to
indicate the module and function to run. Make sure to save once you've made your
changes.
4/ Test your Policy
Using the Test modal, you can try your dynamic rate limiting. You can grab the
key for each consumer back in the Services tab where you created them. Like
Step 3, you can fill in the keys into the
Authorization header and start making calls until you hit your rate limit. Try
out the other key and observe the difference in rate limits.
Wrapping up
Congratulations - you've just successfully built an API that's:
- Protected by API key Authentication
- Dynamically Rate Limited
- Deployed to the Edge for superior performance
- and fully documented via your Developer Portal
This is an API experience most companies dream of, and you've just built it in less than an hour.
Next Steps
- Continue exploring our docs to learn about customizing your Developer Portal, or explore our various Integrations
- Grab time with the Zuplo team to have your questions answered
- Start generating revenue from your new API with our Monetization tutorial