Step 2 - Configure Subscription Events
Enterprise Feature
Monetization is available as an add-on as part of an enterprise plan. If you would like to purchase this feature, please contact us at sales@zuplo.com or reach out to your account manager.
Most enterprise features can be used in a trial mode for a limited time. Feel free to use enterprise features for development and testing purposes.
In the previous step, you configured the Developer Portal to enable your customers to subscribe to your Zuplo API. In this step, you will configure Stripe and your Zuplo API to handle a customer subscribing to your API Plans.
1/ Configure Plans
Stripe can send subscription events, through Stripe Webhooks, when a customer subscribes to your API Plans. Your Zuplo API will use those events to connect the Stripe Subscriptions with the Plans in your Zuplo API. For this to work, you'll need to create Plans in your Zuplo Metering Service.
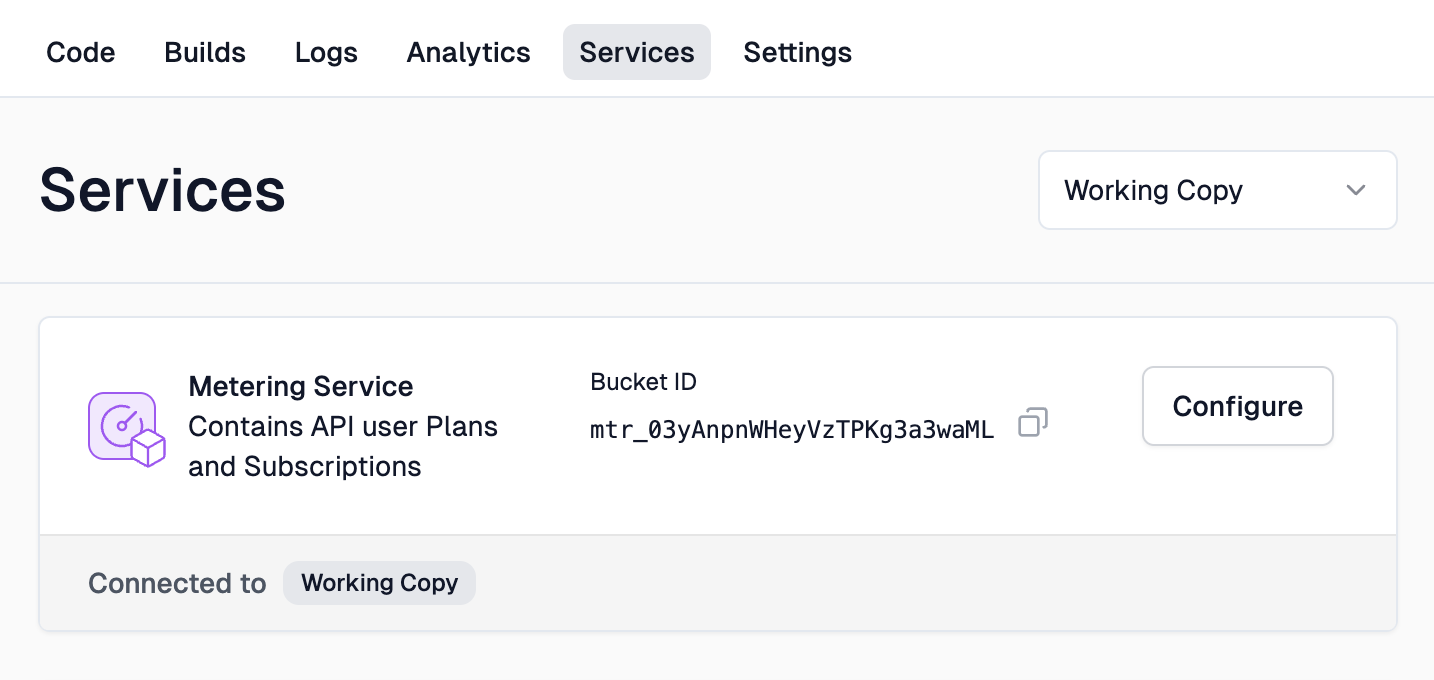
- In the Zuplo Portal, go to your project, select the Services tab, and click Configure on your Metering Service.

You'll complete the next steps for each Stripe Product you added to your Pricing Table.
-
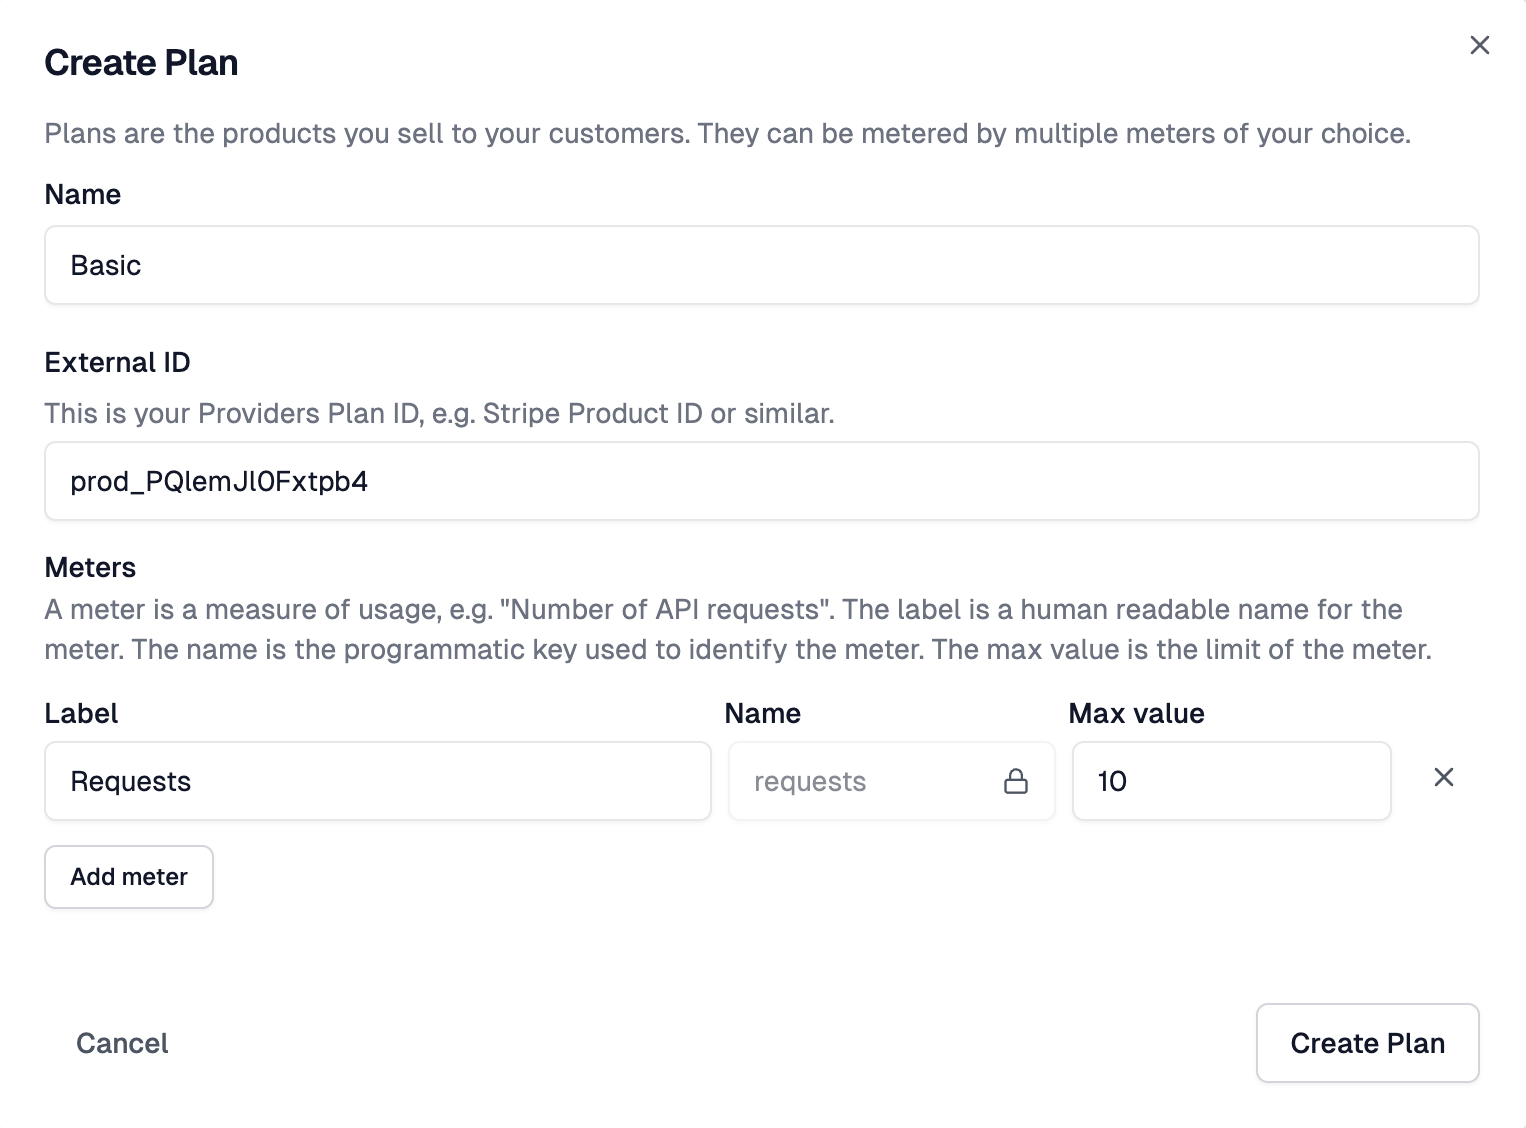
Click Create Plan to create your first Plan. Enter the name of your plan (for example Basic). The name typically will match the name of your Stripe Product.
-
The value of External ID is the ID of the Stripe Product. This value is found in the Stripe Dashboard in the Product Catalog. The value will start with
prod_.

- Next, set a Meter for the plan. To start, create a single meter called
Requests. - Set Max Value to the number of Requests a user can make against your API per month.
During the test phase, set the value of the Max Value to a low number like
10. This will allow you to test the quota later on in this tutorial.
2/ Set Up the Zuplo Plugin
The Zuplo
StripeMonetizationPlugin
enables your Zuplo API to listen to Stripe Webhook subscription events. This
plugin adds an endpoint that's used when configuring the Stripe Webhook.
- To start, navigate to the Code section of your Zuplo project. On the
modulesfolder click the + button and select Runtime Extension.
The zuplo.runtime.ts file is where you can register global plugins and setup hooks within your Zuplo API.
- Add the
StripeMonetizationPluginto yourzuplo.runtime.tsfile as shown below.
import {
  RuntimeExtensions,
  StripeMonetizationPlugin,
  environment,
} from "@zuplo/runtime";

export function runtimeInit(runtime: RuntimeExtensions) {
  // Create the Stripe Plugin
  const stripe = new StripeMonetizationPlugin({
    webhooks: {
      signingSecret: environment.STRIPE_WEBHOOK_SIGNING_SECRET,
    },
    stripeSecretKey: environment.STRIPE_SECRET_KEY,
  });
  // Register the plugin
  runtime.addPlugin(stripe);
}tsThe plugin uses two environment variables. The STRIPE_SECRET_KEY is the same
value that was added to the
Step 1 of this tutorial. The
STRIPE_WEBHOOK_SIGNING_SECRET is a value that you will get after you set up a
new Webhook in Stripe.
3/ Set Up the Stripe Webhook
-
In Stripe, navigate to the Webhooks section and click + Add Endpoint to register a new webhook.
-
Add
<https://your-api-url.dev>/__plugins/stripe/webhooksin Endpoint URL. This URL is your Zuplo API's endpoint to process Stripe Webhook events. -
Click the + Select events button and select the following events:
customer.subscription.createdcustomer.subscription.updatedcustomer.subscription.deleted
Click Add events when done.
-
Click Add endpoint to register your Webhook.
-
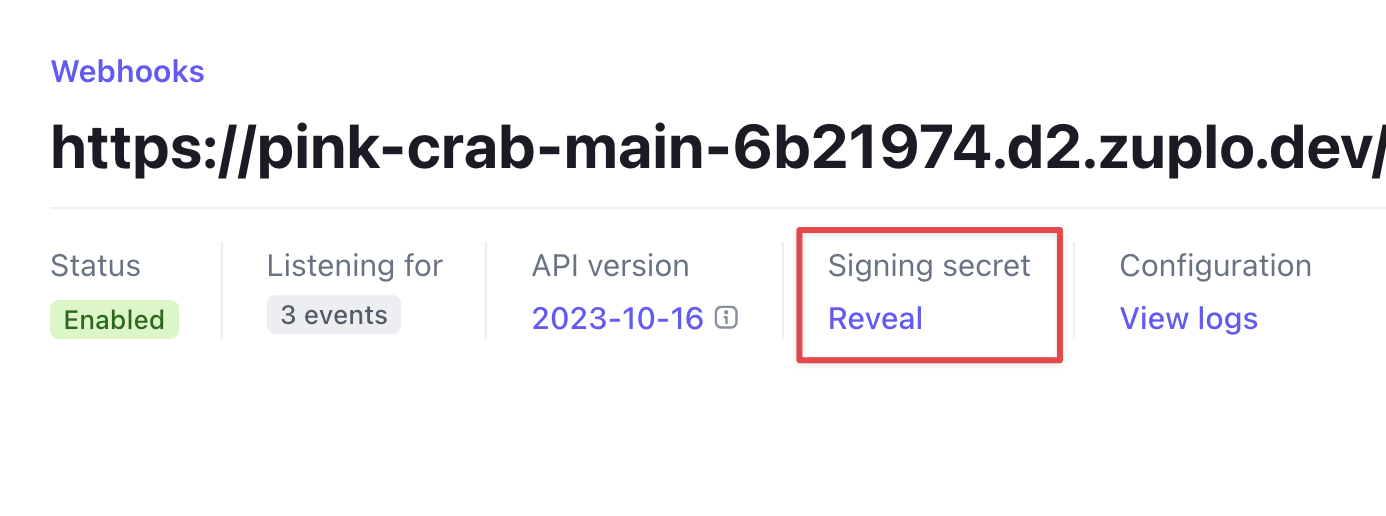
With the Webhook created, find the section called Signing secret and click the Reveal link. Copy this value.

-
Return to the Zuplo Portal, open your project, and go to the Environment Variables section under the Settings tab.
-
Create a new Environment Variable. Set it as a Secret and name the variable
STRIPE_WEBHOOK_SIGNING_SECRET. Paste the value of the webhook's Signing secret you copied earlier and click Save.
4/ Purchase a Subscription
With the Zuplo Plans and the Stripe Webhook configured, you can now test the end to end subscription experience.
-
Navigate to the Pricing page in your Developer Portal.
-
Select a Plan and click Subscribe. If you aren't already logged into the portal, you will be asked to do so first.
-
The Stripe checkout page will open. If you are using test mode, you can enter any test payment method you like.
In test mode, use Stripe test credit card number 4242 4242 4242 4242. Set any future date as the expiration and any three digits as the CVC.
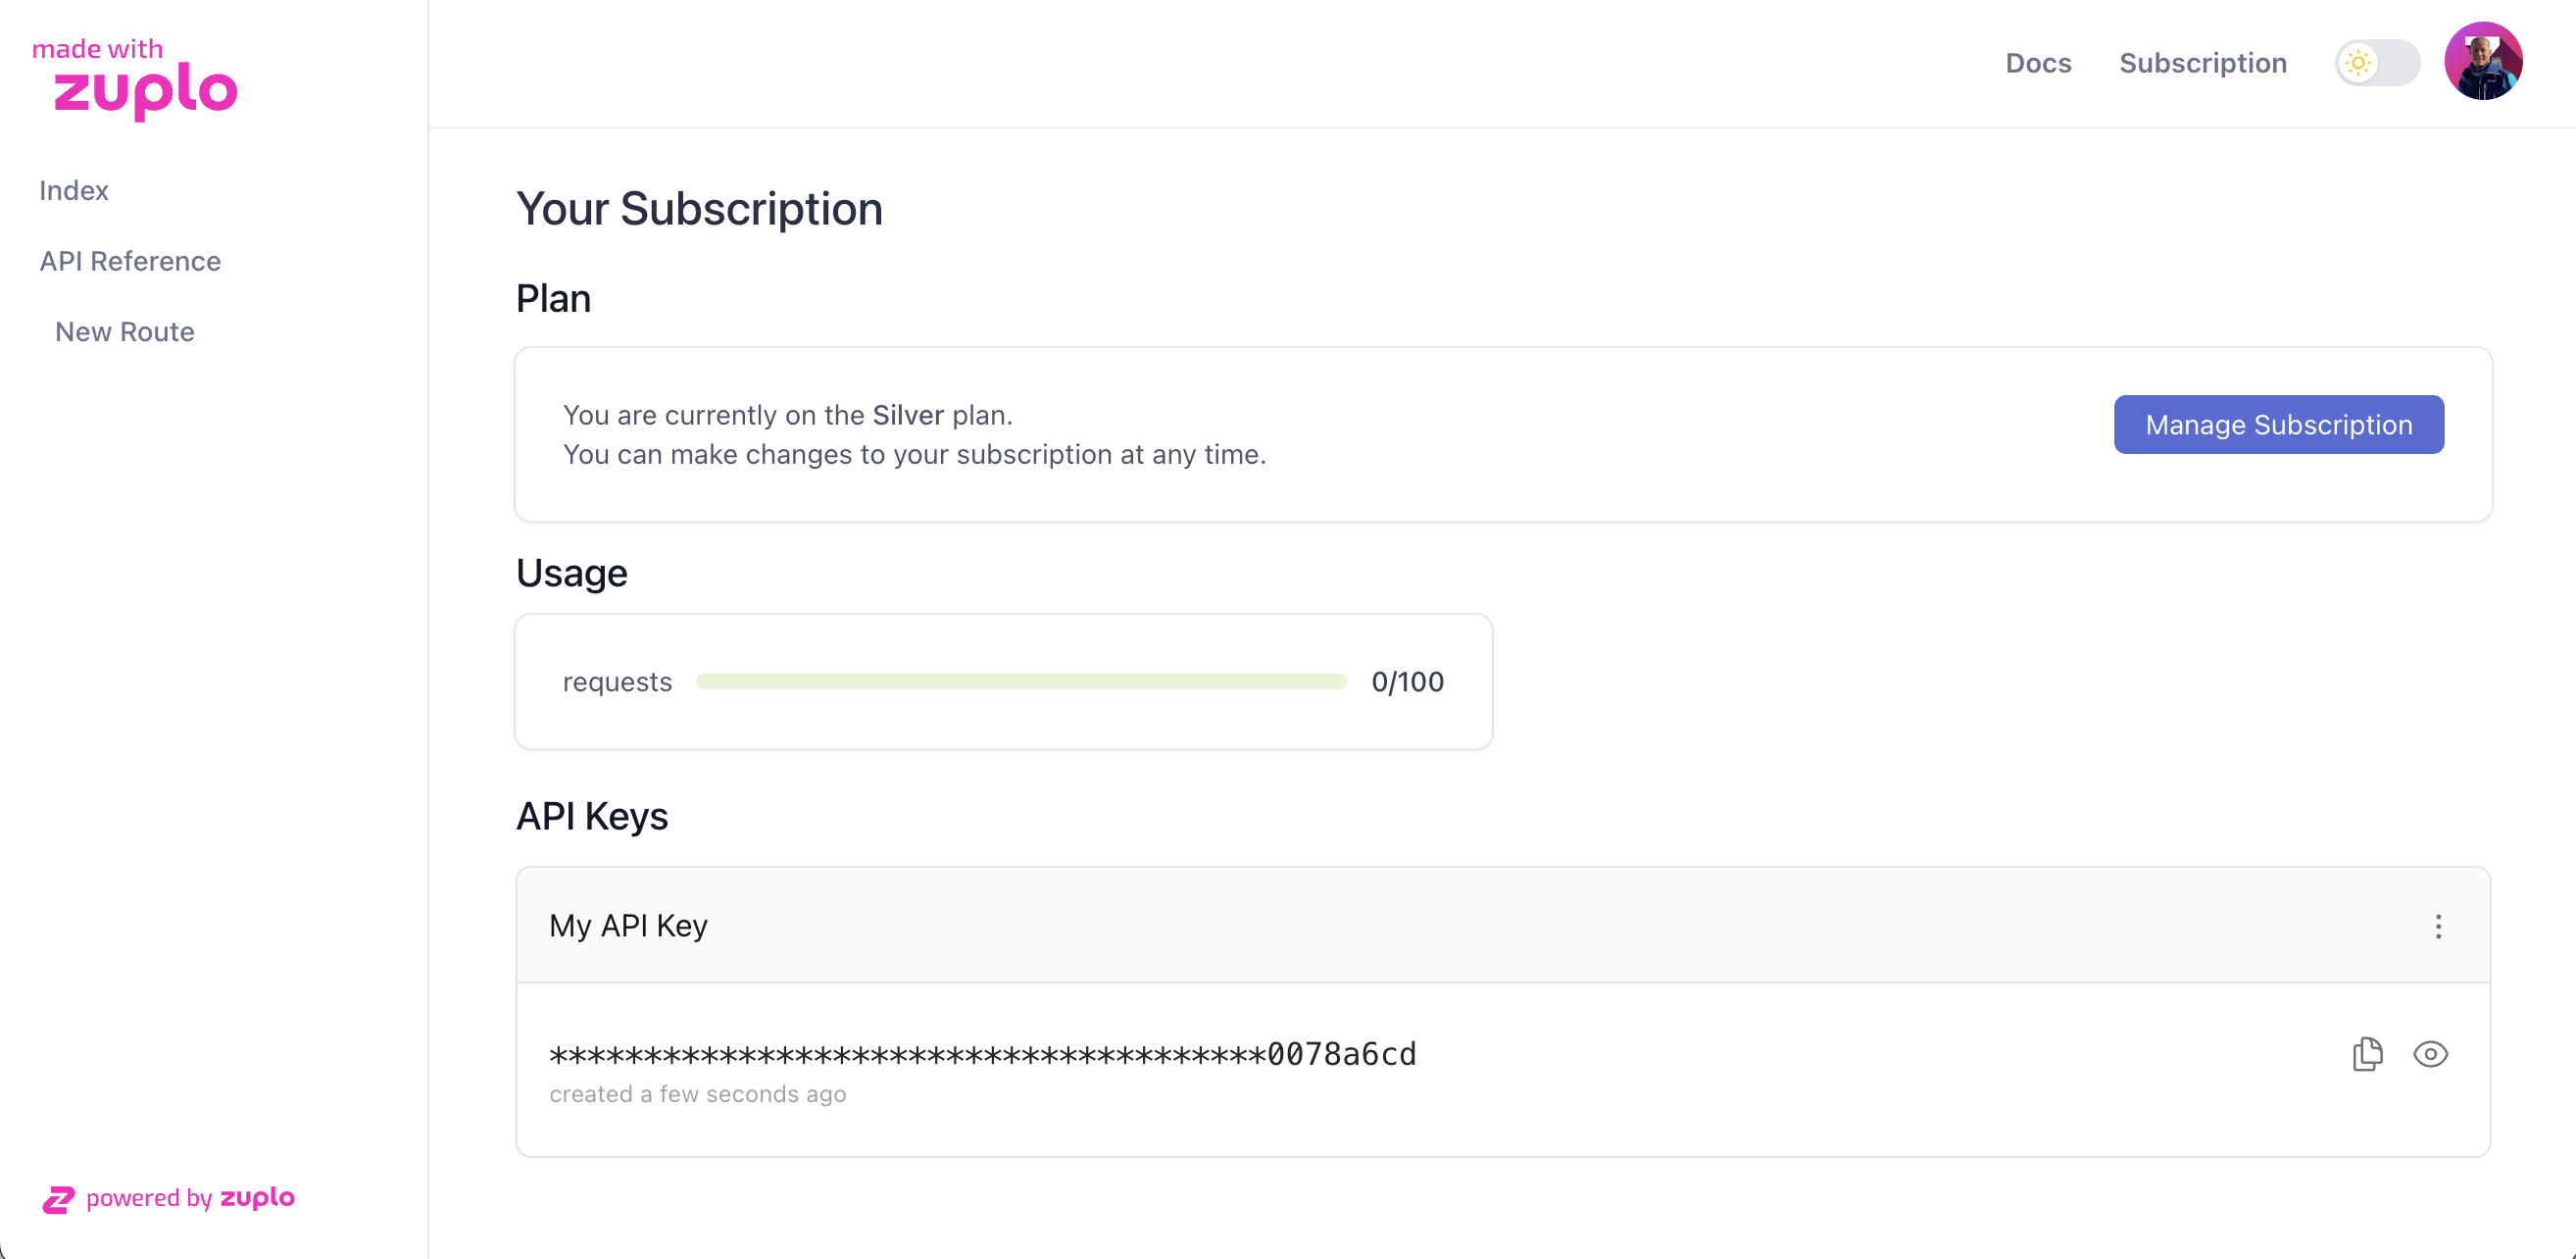
- Once you have completed the checkout, you will be redirected to your Developer Portal. After a few seconds, you should see your subscription page with your API Key.

- Return to your Zuplo project and open the Logs tab. Notice the logs that show information about the incoming webhook.
If you are having trouble diagnosing issues with your Webhooks, the logs are a good place to see what's going on. You can also open the Webhooks page in Stripe and see the history of webhook events sent and their responses.
You've successfully subscribed to one of the Plans in your API. You're one step away from monetizing your API. In the next step, you will add policies to your API, enforce quotas and ensure that users are only allowed to use your API according to the plan they subscribe to.